Week 139:A New Nail Method
- elenalilamartin
- Aug 31, 2025
- 6 min read

Week 139: August 24-30th, 2025
I've been doing my own nails for about two and a half years now, and I've gained a lot of experience and compiled a large collection of nail supplies and polishes. My usual method is a classic gel-x method, normally with full cover tips by NailzKatKat and Beetles Nail Glue. Most of my nail supplies I've gotten from Amazon, but I also have found some local nail supply shops and other online retailers like Sweetie Nail Supply that I like to purchase from. All of my supplies live in a great three-tier rolling cart that is really being put to the test with how many things I try to fit on each shelf.

Along with spending a lot of time, money, and mental space on nails, I also consume a lot of nail content. Recently, I just came across this video by Anne Elizabeth on YouTube where Anne describes "The Cocoon Method" of using a hard builder gel and peel off base coat to have long-lasting, non-damaging gel-x nail extensions with easy removal.
At first I thought it was too good to be true. Nails that really stick for weeks but are also easy to remove? Sounds like a fairytale to me. I say that I want long-lasting nails, and once upon a time, I would keep the same set on for weeks. However, despite loving long nails and the confidence it gives me, recently I do find myself getting sick of certain designs, or wanting extension-free fingers for a craft project. So, when I found Anne Elizabeth's "Cocoon Method," I was really excited to try it out. Anne's video shows each step perfectly, but I wrote the products I used and the basic steps below.
Prep your full cover nail tips by getting the right sizes and etching the inside to make them matte. You can use an electric file (e-file) to file inside of the nail tips to make them stick to the glue better. I use one I got from Amazon a long time ago and it works great.
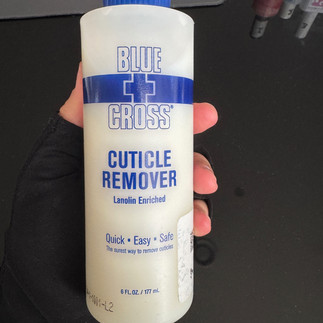
Prep your bare, natural nails like you normally would. Trim and file the free edge, and remove any dead skin. I do it with Blue Cross Cuticle Remover & a metal pusher/nipper.
Put UV protection gloves on and apply sunscreen on your hands and fingers. I use MelodySusie gloves from Amazon and usually a simple body sunscreen, like Neutrogena. I think this step is important, especially with how frequently I expose the skin on my hands to both sunlight and UV lamps.

Use a dehydrator and a primer. I'm finishing up a bottle of Modelones Dehydrator and using my favorite Young Nails ProteinBond Primer. I don't think I'll get the Modelones dehydrator again, and I definitely do not recommend their primer (it did NOT work for me), but I do swear by the YN ProteinBond stuff.
Put a layer of base coat on to protect your natural nail and help the additional layers stick. Be sure you use a clean-up brush (I've found these are decent and don't dry out quickly with constant acetone dunking) around the nail before curing so the gel does not touch your skin. I use Yogo Zombie Base Gel (the same as the one Anne uses in the video) & cure for at least 60 seconds with my UV light.

Add one layer of hard builder gel & cure for at least 60 seconds. I used a bottle of ibd Building Gel in ‘Cover Pink - Overture Rose’ and did two layers (cure first layer for 60s, apply 2nd layer, cure again). You can also use different colors of building gel, or even hard gel in a pot instead of a bottle, but this is what I had already. Reminder: clean up the cuticle/any overflow onto the skin with a clean up brush and acetone before curing.

Apply a no-wipe shiny top coat to the builder gel layer, clean up the sides, and cure for at least 60s. I used AIMEILI No Wipe Top coat. It is very important to keep this layer shiny. Do not buff or wipe it! The slippery-ness of this top coat is what makes removal really easy.

Use a peel-off base gel as the nail glue, instead of a normal nail glue for gel extensions. This is what makes removal quick and easy on top of the slick No Wipe top coat from step 7. I used FZANEST Peel-off base gel as glue and applied my XXS tips from NailzKatKat. It is important to place the nail tip first at an angle, avoiding touching the cuticle skin, and then slowly press it down to get rid of any air bubbles. If any of the glue comes out from the sides of the nail, I know I've put too much product on the nail tip. If that happens, I just clean it up with a clean up brush as quickly as possible while still holding the nail under the UV light. I use a gooseneck UV lamp that I got from Amazon for each nail, similar to this one.
Once all the nail tips are on, I cure my whole hand in the big UV lamp for at least another 60s. Then, I file the free edge of the nail and the sides to clean up the set. It is important to file the nail by the cuticle for a smooth transition between natural nail and extension. I use DIAMI Edge file in 180 grit and the round drill bit tip for the e-file.

After the shape of the nails is good, add any colors or designs to the nail. I used #111 from the Liuhwa Champagne Collection, but you can use any stickers, gems or gel colors. It is okay to have some product on the transition area near the cuticle, but don't get it near your skin. Think less is more.
Complete the set with a top coat. I use my new favorite, YOGOMAYO Glass Top Gel, but you can use whatever top coat you like. I also recommend the DND Top Coat if you like a thicker consistency. With top coat, I always try to remember to seal the free edge of the nail while avoiding any overflow onto my skin.

YOGOMAYO Glass Top gel is one of my favorites to use Finally, wipe off any stickiness remaining on the nails with rubbing alcohol and apply cuticle oil. I really like this cuticle oil pen (its refillable!) from Holo Taco.


The first time I did this new "Cocoon" method, it lasted me a week before one nail popped off. TO be fair, I had forgotten base coat on that hand and suffered the consequences. I also think I could've kept the rest of the nails on for much longer, but I was excited to see if the nails would really come off as easily as Anne Elizabeth's demonstration. So far, Anne Elizabeth's method actually is working for me and I am starting to think this wasn't too good to be true!
You may want to order the exact products in the video, but I honestly just used what I had on hand and its worked out great. I think I will be doing this method from now on, but I have yet to see the long-term effect on my natural nails. I hope this will help me grow stronger natural nails. I've always been a nail biter, and going to the nail salon helped curb that habit. However, years of acrylic and improper removal (my fault entirely) wrecked my nail beds and I'm trying to grow nails that aren't paper thin and break easily.
The only worry I have with "The Cocoon Method" is being able to tell what layers are left after I peel off the nail tips. It may be a good idea to use a glitter no wipe top coat like Anne says in the video, but for now, I will probably play it safe and e-file off anything, put a tiny bit of builder gel on, then the top coat, and the peel off base coat as a glue again (starting at #6 or #7 above after removal, basically). For anyone wanting to try this method - definitely do it and let me know how it goes.
For anyone wanting non-professional, non-certified nails done, let me know as well, because I want to get more practice doing other people's nails, not just my own.
Happily signing off with my clickity-clackity keyboard and my newly applied "Cocoon Method" nails. See you next week.


Comments